![<?echo $_SERVER['SERVER_NAME'];?>](/template/twentyseventeen/skin/images/header.jpg)
With Gabriella Ainslie of Matriarchy Build
Like many new homeowners, we moved into our house with plans to tackle some design upgrades after settling in. We figured we'd handle the major stuff before the move and save the smaller cosmetic tweaks for later. Our bathroom, in particular, was on our list for a makeover. It just needed a little TLC to feel fresh and functional.
Fast forward four years and one toddler later, and our bathroom update still hasn’t happened! We needed more storage, and I was eager to try some Shelfology products. I opted for the Bender FM3 shelves in Steely Blue. These shelves would provide the storage space we needed while adding a pop of color to our otherwise neutral bathroom. I also grabbed a couple of hooks: the Doohooky and the Why Not in Purple Dusk, to bring in a bit more color and create designated spots for our towels and robes.
The installation process was surprisingly simple. The hardware is sturdy, easy to work with, and not intimidating at all. Here’s how I did it, with the help of our Matriarchy Build associate, Maria Salmeron:
1. I found my studs and marked them.
I used a stud finder that’s been great in our home—it lights up and beeps when it detects a stud, making it easy to mark where we needed to put the screws for maximum support. There are tons of stud finders out there, but this article does a great job of helping you choose the right one. Our Matriarchy Build experts even weighed in, and this one came out on top! Pro Tip: A screw in a stud can hold about 100 pounds, so it’s both strong and secure.
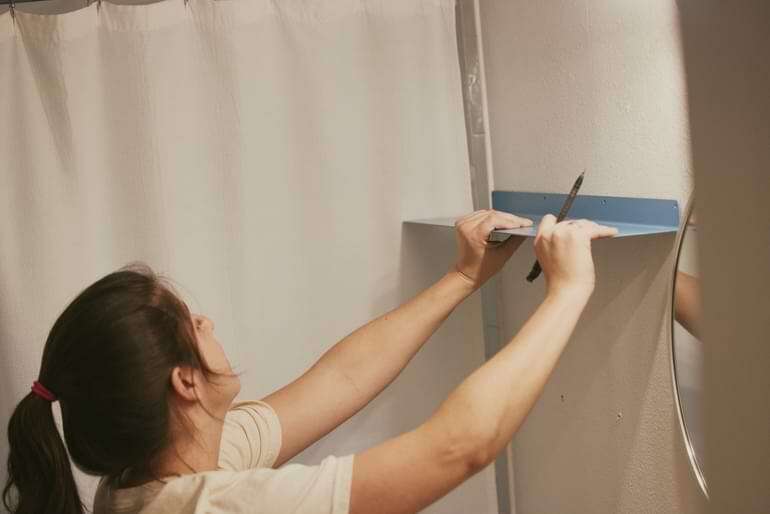
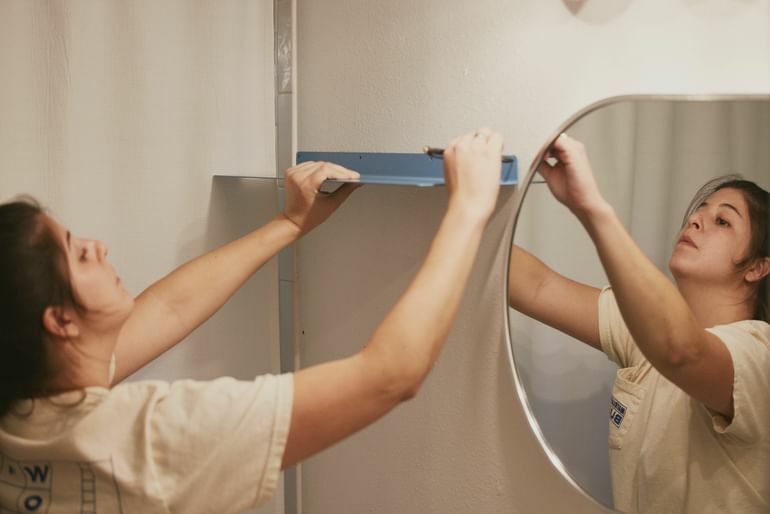
2. I held up the shelf with a level on top and marked the places I wanted to drill my pilot holes aligned with my studs to ensure at least a few screws were going into the studs for maximum support.
If you're looking for a level, there are plenty of options out there, each with its own pros and cons depending on the project. Here’s some helpful info to guide you. For this shelf installation, I used this level. Pro Tip: Having an extra pair of hands to hold the shelf steady makes using the level much easier. If you're installing a lighter or shorter shelf, you can definitely do it solo, but it's always nice to have a helping hand!


3. I drilled in my pilot holes where I’d marked them.
For areas where I’d need to put screws into the drywall, I used anchors. Here's some handy info on the difference between screws and anchors and when to use each. Pro Tip: I love having both a drill and an impact driver on hand for those moments when I need a little extra oomph. Here’s my current favorite setup that includes both!
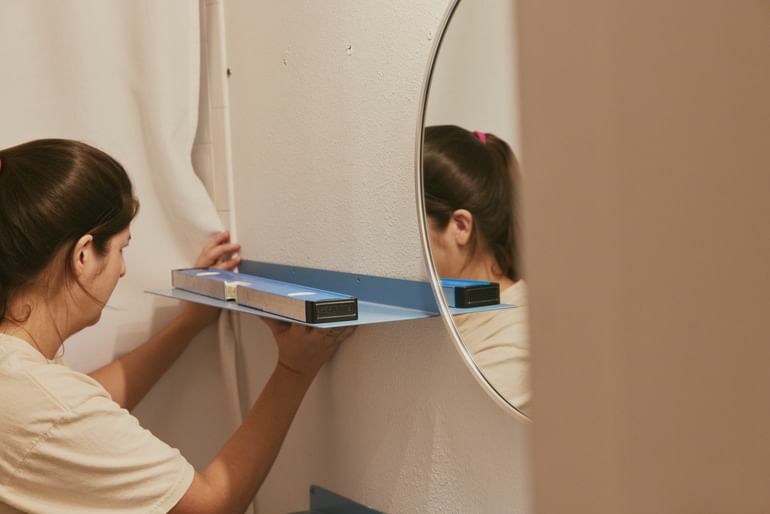
4. I held up my shelf again with my level on top to double-check that my anchors and screws were set nice and level.
Pro Tip: You can never double-check that things are level enough times before screwing a shelf into the wall! Trust me, it'll save you headaches later.
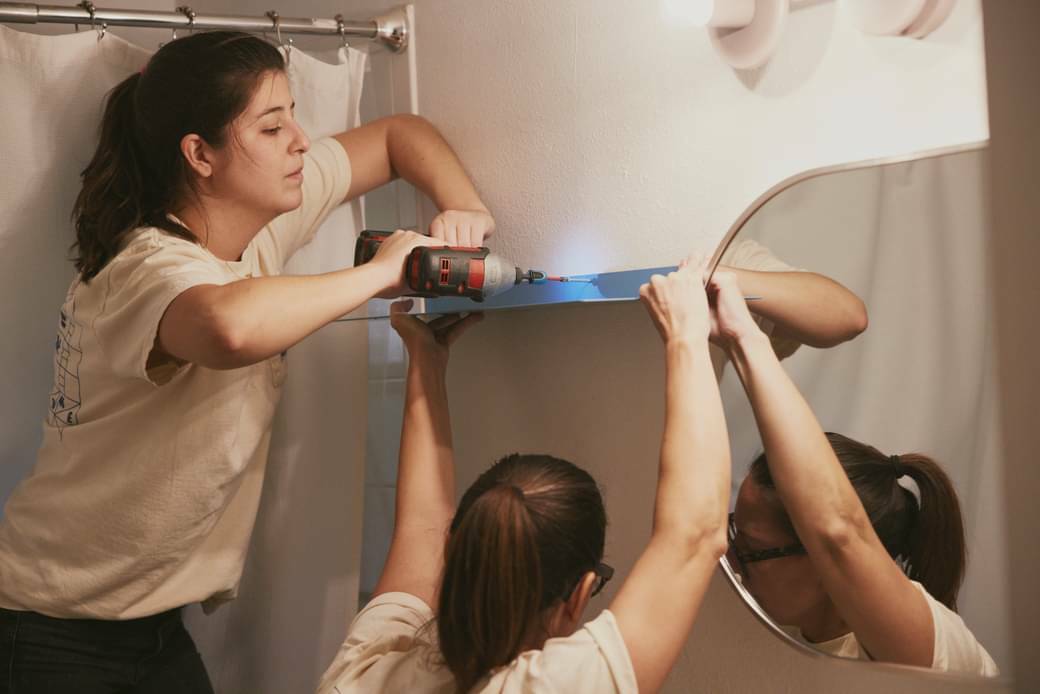
5. Then I used my drill again to screw in the shelves with the cute (painted to match!) screws that were provided.
They went right into the studs and the anchors smoothly, and I was done! Pro Tip: Easy does it with your drill on this step. Press it smoothly and consistently for the best result.
Before I knew it, the shelves were up, the hooks were installed, and the bathroom felt like a whole new space!
Gabriella Ainslie
Gabriella is the Co-Founder and Co-CEO of Matriarchy Build, an online platform with a female perspective on DIY and home improvement. Before Matriarchy Build, she worked in home and fashion retail, including stints at ABC Home, Terrain, and Bunkhouse Group hotels. She studied literature at George Washington University in Washington, D.C. When she’s not busy running Matriarchy Build, she lives in Austin, TX with her husband and daughter, and they often head to the high desert of West Texas for hiking or the beaches of Puerto Rico for some ocean time.
Lacey Soslow
Lacey is Co-Founder and Co-CEO of Matriarchy Build, a female-first home improvement and DIY platform. Before launching Matriarchy Build, Lacey spent over 12 years leading marketing and digital efforts for Terrain, the home and garden brand from the URBN/Anthropologie group. Alongside her time at Terrain, Lacey also spent six years renovating old homes in South Philly with her mom. Together, they completed six projects, sparking her passion for the home improvement space. Originally from Philadelphia, Lacey divides her time between Philly and NYC with her wife Michelle.

Matriarchy Build
Matriarchy Build is a home services platform with a female-first point of view. Matriarchy Build connects consumers to tradespeople for 1:1 online consultations to discuss DIY projects and repairs, as well as offering guidance on larger renovation and remodel projects. In Austin, TX, Matriarchy Build also offers in-person handyman services.
Related Radness
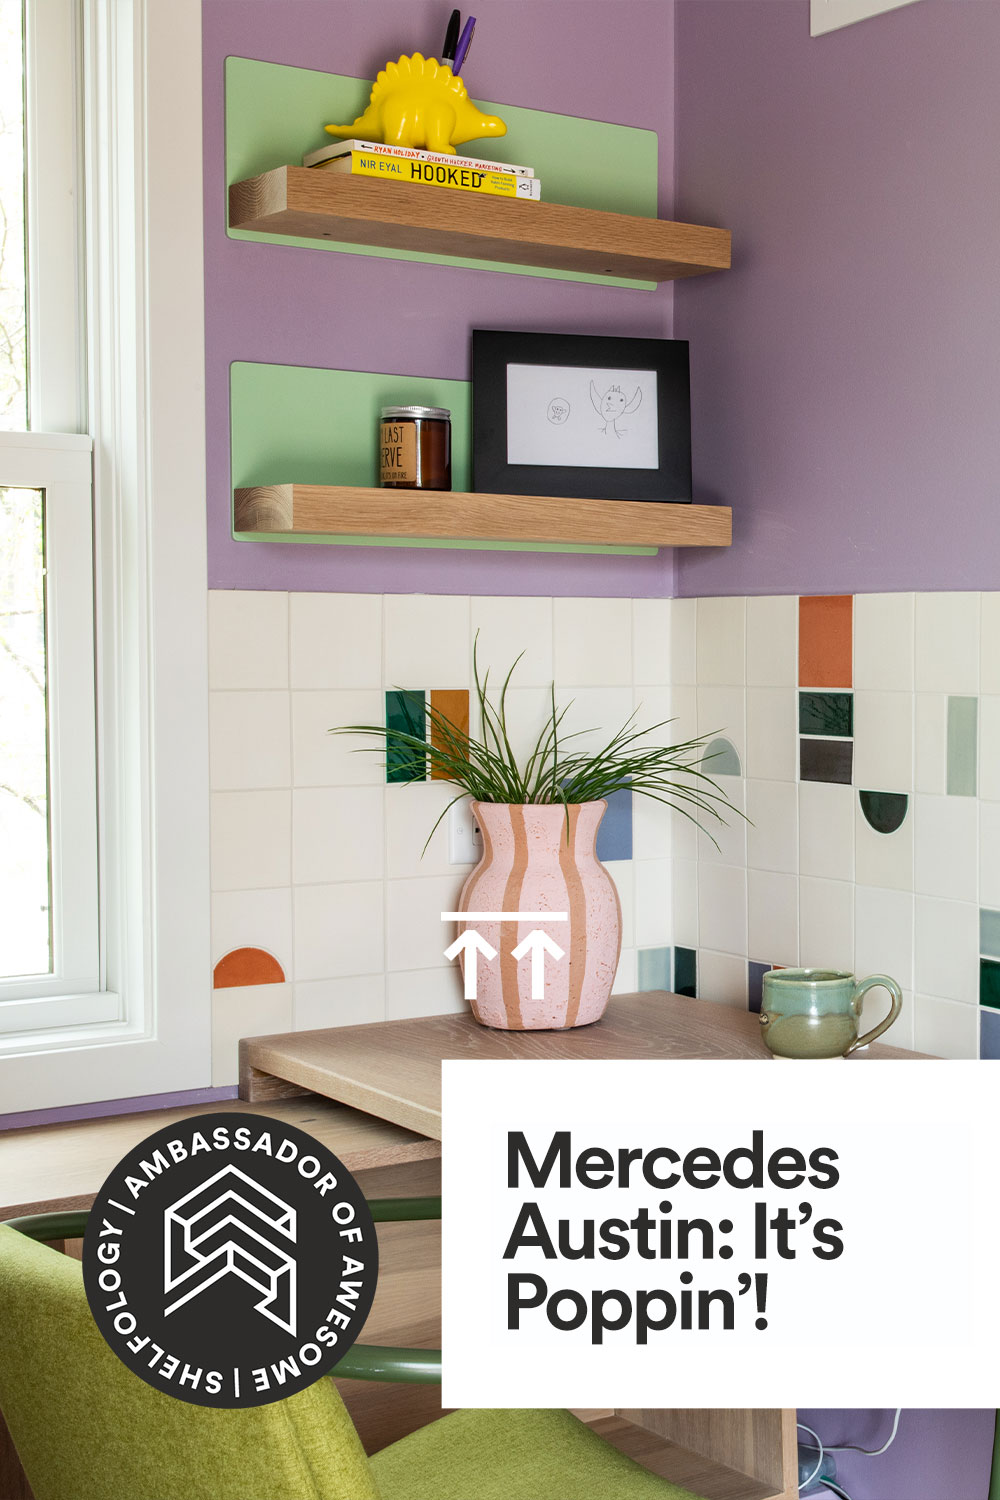
Mercedes Austin "It’s Poppin’!" Project Recap

Certified Rad: Brownstone Boys Palomas on Poplar
Hey Now Interiors: Schoolhouse Sorbet Project Recap

Certified Rad: Amy Hadley, Hey Now Interiors
Plastic Packaging Tube,Plastic Packaging Tubes,Clear Plastic Retail Tubes,Clear Plastic Packaging Tube
NANTONG OUFEIYA IMP& EXP CO.,LTD , https://www.nantongoufeiya.com